
Views

Tables can be filtered with views.

What is a View

When a view is a filter on a table. Views allow you to:

  • Change which columns are displayed on the table
  • Limit which rows appear on the table (even when searched)
Example

Here is a table that is currently showing all of the sales leads that a company has. This table and its views comes packaged with Rapid Business.

A screenshot of a data table that contains all of the leads a company has. The table has the following columns: Full Name, Company Name, Industry, No. of Employees, Annual Revenue, and Status. The list contains several example leads. Their statuses contain values such as: New, Nurture, Unresponsive, Contacted, and Converted.

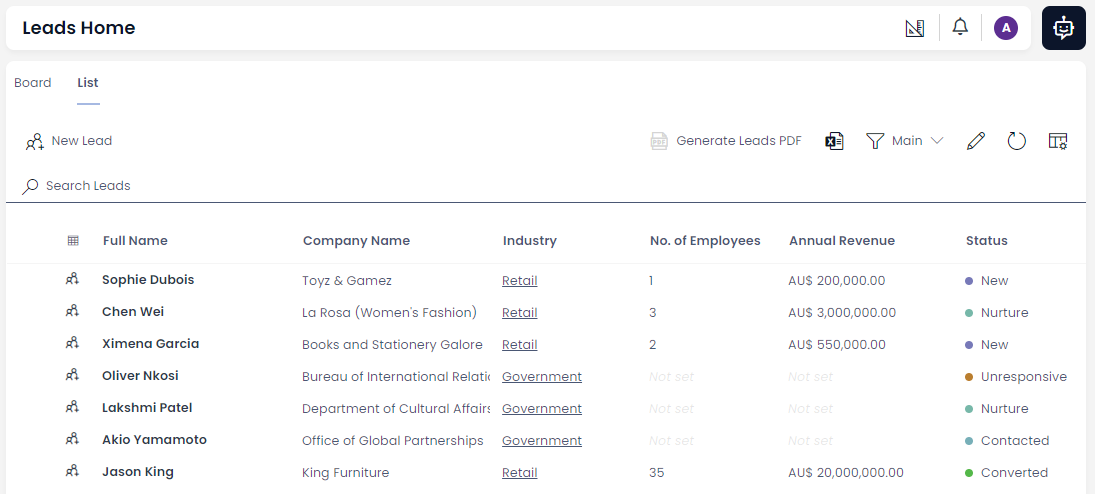
Currently, this table shows leads that are at various stages of a sales pipeline. On the far right column, we can see that some of these leads are new. Others require nurturing. One lead is unresponsive.

You can change a view by going to the Command Bar at the top of the table, and clicking the dropdown menu with the icon of a filter.

A screenshot of the user changing the view from "Main" to "Nurture" The screenshot is annotated with two red boxes to indicate that the user clicked the "View" drop down menu, and is now about to click on the "Nurture" option in the dropdown menu.

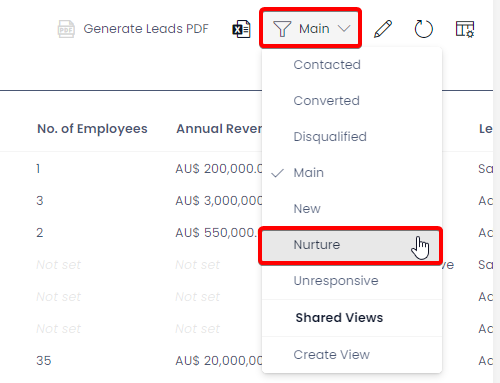
When a view is applied, it will display the data according to a set of rules that you choose. For example, this view only displays leads that have their Status set to Nurture.

A screenshot that indicates the view on the table has now been changed to "Nurture". The screenshot is annotated with a red box to indicate that the "View" dropdown menu now reads "Nurture", whereas before it read "Main". Underneath, in the data table, there are now only two items present (the same items that had their status set to "Nurture"). Thus, the data table only reveals items that follow the rule of the filter.

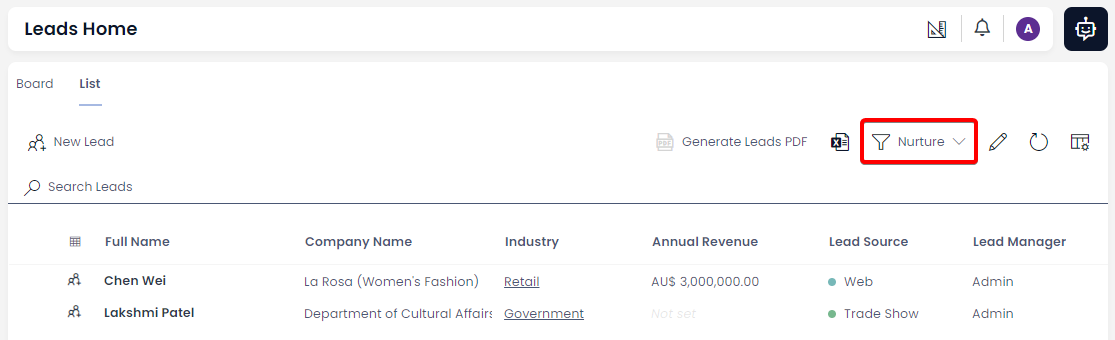
You can also see that different columns are displayed. This new view chooses to hide the No. of Employees and Status columns. Instead, this view displays a new column of data called Lead Manager.

Search

You can also use the Search Bar on a table to quickly search a table's view for specific items or rows.

A screenshot of a user who has searched the leads table for "Lakshmi". The data table now presents only one item in the table: a lead whose full name is "Lakshmi Patel". The screenshot is annotated with two red boxes. The first annotation indicates the location of the search bar and the fact that the user has typed the word "Lakshmi" into the search bar. The second red box annotation indicates which column produced a result "Full Name" and indicates that the item row was returned because this column contained the name "Lakshmi".

Why are Views Important?

Views allow us to quickly find the information we require.

Example

e.g. What if I only want to see the Contacts for my company who have been Archived? In Rapid Business, I can switch to the Archived view on my Contacts table to do this.

Creating a View

You can create your own views to filter data on any table.

To create a view, go to the dropdown menu where we changed our view, and click Create View

A screenshot demonstrating the location of the "Create View" button in Rapid. The screenshot is annotated with two red boxes that indicate where the user should click. First, the user clicks on the "View" dropdown menu at the top of the data table. In this example, the View button reads "Main", because that is the current view. At the very bottom of the dropdown options is the button "Create View". The user's mouse is hovering over this option, and the second red box is drawn around this option to indicate its location.

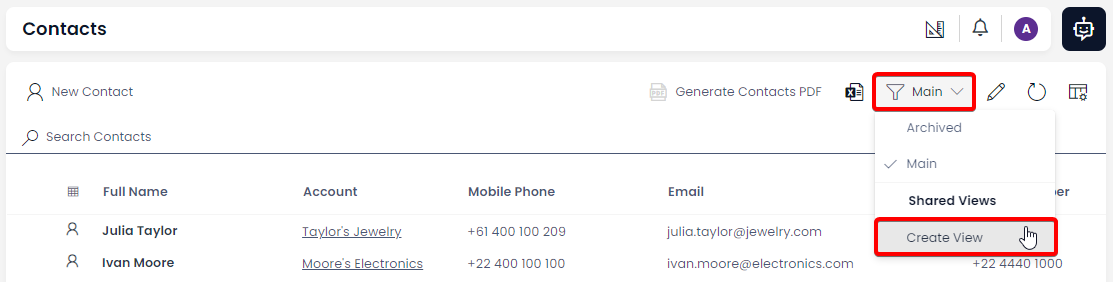
A sidepanel will open, where you can create a new view.

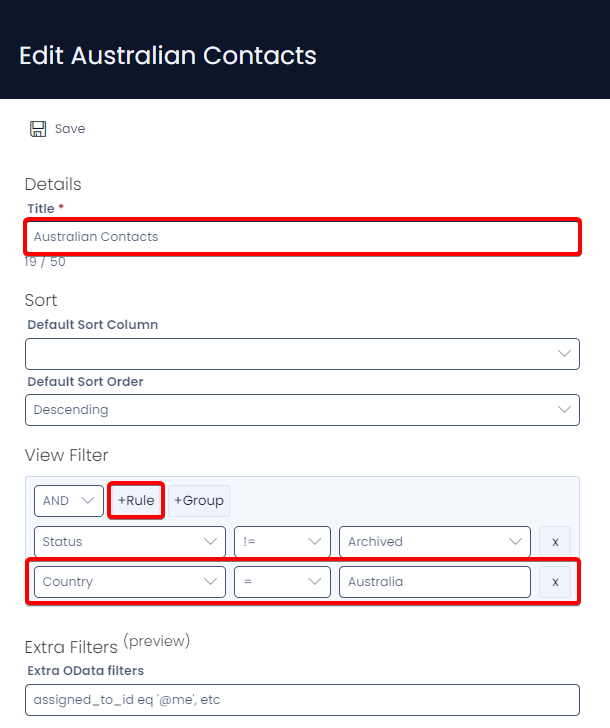
Let's say we want to create a view that only shows the Contacts who are in Australia.

  1. Give the view a name (e.g. "Australian Contacts")
  2. Scroll down to the View Filter
  3. Add a new filter rule with the + Rule button
  4. Choose the Country column from the drop-down menu
  5. Ensure that the logic is set to = (equals)
  6. Type the word Australia in the final box

This tells the view to only show rows where the Country column contains exactly one word: "Australia".

A screenshot that demonstrates how the sidepanel should appear after the steps above are followed. The screenshot is annotated with red boxes to indicate the location of the fields that need to be edited for the steps above to be completed.

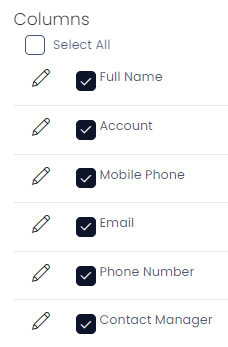
:::Selecting Columns[info] You can also scroll down to select which columns should or should not appear in the view.

We can drag and drop columns in this list, to change the order that the columns appear on the table (columns at the top of the list are displayed first).

A list of columns for the contacts table that have been selected to be displayed. The columns each have a pencil button on the far right (where the attributes of the column can be edited). They also have a blue checkbox, which indicates whether or not a column will be displayed. :::

  1. Finally, press Save at the top of the sidebar

Editing and Deleting a View

With the Pencil Button

We can edit how a view's columns appear by clicking the pencil icon in the Command Bar.

A screenshot of the Command Bar. The screenshot is annotated with a red box to indicate the button's location. The pencil button is where a view's columns can be resized or reordered.

Here, we can resize or reorder our columns.

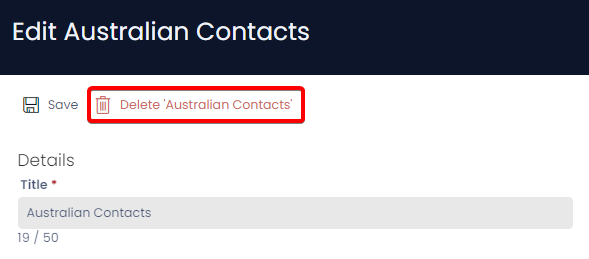
With the Edit View Settings Button

Alternatively, we can edit a view's logic and appearance by clicking the Edit View Settings button on the far right-hand side of the page.

A screenshot of the Command Bar. The screenshot is annotated with a red box to indicate the button's location. The button's icon resembles a table with one header row, three columns, and then a cog in bottom right of the icon. The "Edit View Settings" button is where a view's logic and appearance can be edited.

Using this option, we can also choose to delete a view, as long as it isn't the main or default view.

A screenshot demonstrating that a user can delete a view. In the "Edit View" sidepanel that opens, the user can select the button that reads: "Delete X", where X is the name of the view currently being edited. The button has red text, and has an icon of a trash can. The screenshot is annotated with a red box to indicate the location and appearance of the button.

Further Reading

  • The User Manual goes into extensive detail about how to configure views and gives more examples of how views work